

1. Measure the opening the gate will fit into.
2. Cut the top rail 7 1/8” shorter than this measurement.
3. Cut the bottom rail 7 1/8” shorter than this measurement. Make sure that the spacing from the cut to the first hole in the bottom rail is the same at both ends. You may have to cut both ends to
accomplish this.
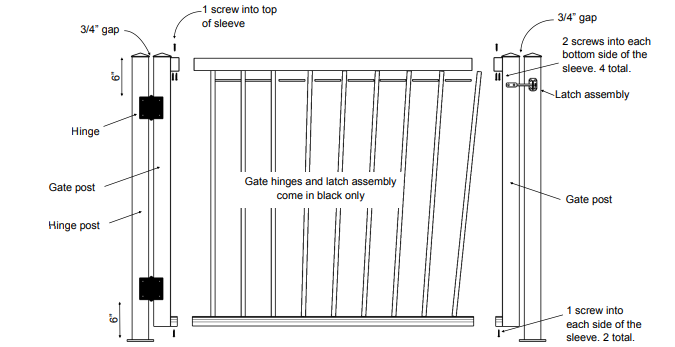
4. Insert the top and bottom rails into the post sleeves, keeping the predetermined post spacing from #3 above. Using #10 x 3/4” tek screws, (sold separately part # CS50) fasten 5 screws at each top rail sleeve connection and 2 screws on each side of the bottom rail sleeve connection, checking to make sure the gate stays square.
5. Cut and install the first spacer clip the same size as the space between the last hole in the bottom rail and the post. Start installing pickets, putting the picket into the bottom rail and plumbing it, then inserting a spacer clip into the top rail. Continue until there are 3 empty spaces. Insert those pickets as a group, then spread them out and secure with spacer clips, cutting the last clip to length.
6. Measure down 6” from the top of the hinge post and 6” up from the bottom of the hinge post and attach the hinges. Align the top of the gate post with the top of the hinge post and secure the gate to the hinges. Attach the latch assembly at the desired height. Hinges and latch assembly are secured using the supplied #12 x 1” tek screws.

Residential installation only. Commercial applications may differ. Always check with local building codes prior to purchasing and installing this product.


0 Comments